I also decided to include the music that I used for my Minor submission just to get a better idea of how things meld together. I struggled to edit it when it was pure silence and my voice because everything felt just slapped together, so the addition of temporary music helped me work on it. I feel better about how this is turning out and I think the music will really help the shots sit together. There is quite a lot I still need to work on, but I feel a bit more confident with how things are looking together and I'm very excited to hear what my music composer is going to come up with. I've already begun setting up a few more shots with animated lights so I suspect the duration may change still.

Saturday, 31 March 2018
Major Project: Pre-vis 003
I decided to put together another pre-vis now that most of my footage has been rendered out. I've included some of the shots I've been testing in regards to re-filming live action as well. I tried to take some previous feedback into account and rearranged some shots so the ones that have flickering lights are paired up next to the live action shots to help with transitioning. These transitions very rough at the minute, I will probably edit my film in After Effects later on so I can make some proper glitch effects to help with transitioning.
I also decided to include the music that I used for my Minor submission just to get a better idea of how things meld together. I struggled to edit it when it was pure silence and my voice because everything felt just slapped together, so the addition of temporary music helped me work on it. I feel better about how this is turning out and I think the music will really help the shots sit together. There is quite a lot I still need to work on, but I feel a bit more confident with how things are looking together and I'm very excited to hear what my music composer is going to come up with. I've already begun setting up a few more shots with animated lights so I suspect the duration may change still.
I also decided to include the music that I used for my Minor submission just to get a better idea of how things meld together. I struggled to edit it when it was pure silence and my voice because everything felt just slapped together, so the addition of temporary music helped me work on it. I feel better about how this is turning out and I think the music will really help the shots sit together. There is quite a lot I still need to work on, but I feel a bit more confident with how things are looking together and I'm very excited to hear what my music composer is going to come up with. I've already begun setting up a few more shots with animated lights so I suspect the duration may change still.
Friday, 30 March 2018
Major Project: Re-Filming Live Action Footage #4
After some feedback I continued working on re-filming my live action footage. I'm struggling with some of the shots to achieve a full bleed while angling/animating the camera and focusing on a specific subject (#12). The movement for shots like this may require much more subtle camera movement than others or else the edges of the projection will be visible or the camera will move away from the focal point. I'll continue to work on it though, I think every shot will have different requirements and difficulties.
 |
| #12 |
I am quite happy how #13 came out, I feel that it achieves a distorted 3D effect much more. I changed around the lighting for a single disc area light, so it gives a similar affect to a spot light. This gave me a better ability to create highlights and shadows on different ends of the screens to show the perspective.
 |
| #13 |
 |
| #13 |
I wasn't quite happy with how #14 came out, but I continued working on it and I like how #15 came out much better. I think part of the difficulties will also include the colour of the footage and how the lights affect it. Again, I think every shot will differ depending on if it has a specific focus and the colours.
 |
| #14 |
 |
| #15 |
Thursday, 29 March 2018
Major Project: Re-Filming Live Action Footage #3
Here are a few more live action re-filming tests. I'm not quite sure if this is achieving what it is meant to, but I'm quite happy with how #8 turned out. I think it feels much more 'in the space' and I like how I got the lighting to change as my grandfather's photo appears. I'm trying to not overthink it, since I know that it is meant to be subtle but I hope I am on the right track. Luckily these shots are relatively quick to create and render out so I can continue to experiment until I feel the shots are right.
 |
| #8 |
 |
| #9 |
 |
| #10 |
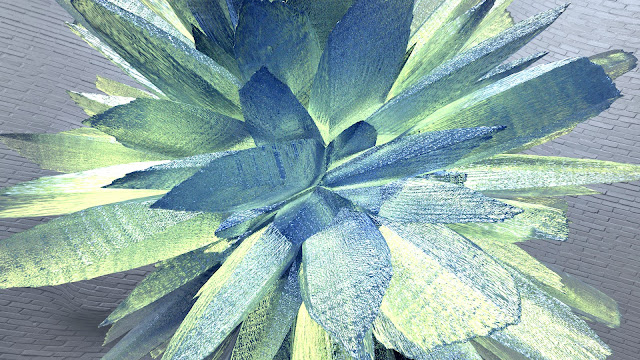
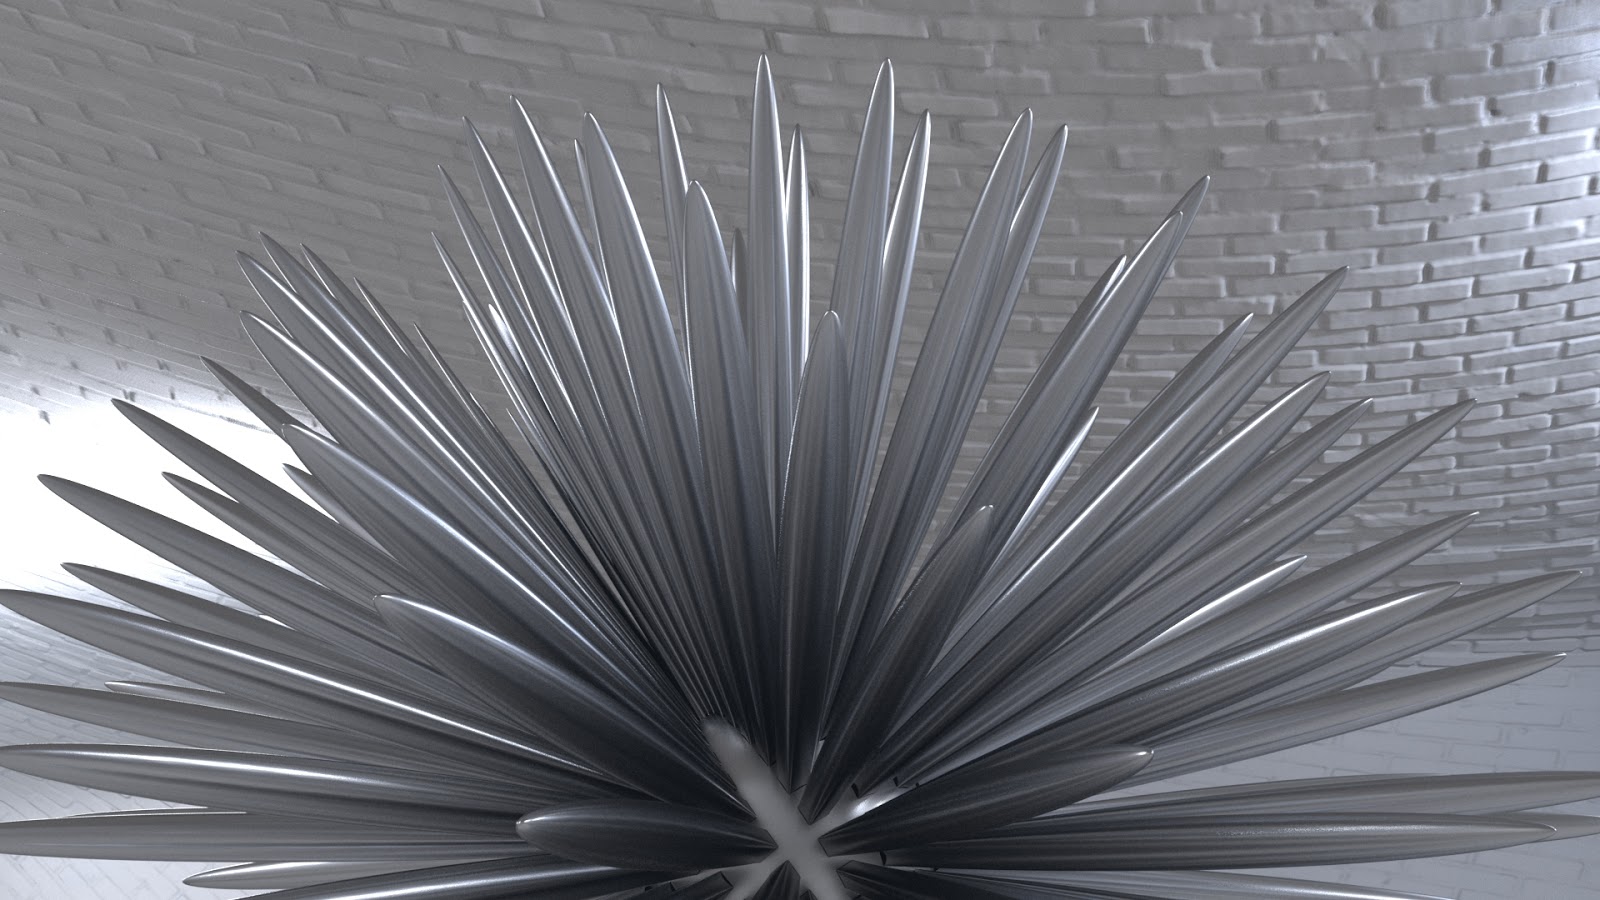
Major Project: Additional Rendered Stills
As I work on my Art Of, I wanted to create a few more renders of my entities so I can have a few full bleed pages exhibiting the objects and the details in their textures/simulations. It's a rather large chunk of images, but I wanted to share it on my blog so others can see it and to ensure everything is backed up in case I were to lose them. There are still some more I need to make, but here are the ones I've put together so far.


Pufferfish


Sponge


Meat


Chicken Skin

Bees


Vertebrae


Bleach


Needles

Wires


Gem


Silk


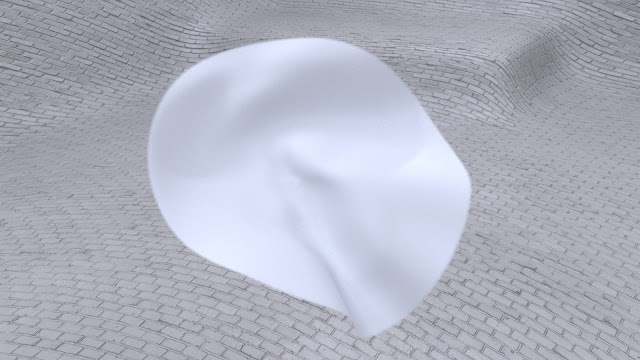
Soap


Major Project: Snowfall & Soap Bubbles Composites
Here are a few more shots that are finished rendering. This snow scene, as I mentioned in a previous post, may be replaced by a 'snowball' shot rather than the shot below. I do like how the render came out, but I'm unsure if it is too soon to break away from the pattern of the sphere entities when I discuss my family and snow. Either way, the snowfall scene is one of my several options for this part of my film.

Below are three of the soap bubble scenes that I created. One shot (version 002) is still missing a few frames for the room pass as it was the only one that had camera movement. That one should be done soon, but I wanted to share the other versions anyway. Again I'm glad I spent some extra time on the soap bubble texture, the liquid animation is subtle but is a nice detail if you notice it.
 |
| Original Version |
 |
| Version 001 |
 |
| Version 003 |
Excluding the last soap bubble shot, the 'snowball' shot, and any live footage re-filming I'm pretty sure all of my major shots are rendered and have a basic composite file set up so I can just go back and tweak them to ensure they are consistent. I'm relieved that I managed to get all of these shots rendered in time. Seeing the high render times for some of the scenes made me quite nervous but I think planning and keeping track of everything using diagrams and charts really helped me stay on top of things.

Wednesday, 28 March 2018
Major Project: Re-filming Live Action Footage #2
I've continued working on a few tests today in regards to re-filming my live footage. I quite like the shot I left rendering last night (#6), I like the new positioning of the lights but I'm unsure if the light flicker is necessary for this particular shot.
For test #7 I decided to try using a clip that had a specific focus so I can play with the relationship between the camera/lights and the subject - in this case my grandfather. For this test I tried animating the lights so the bottom light is brighter in the beginning of the animation, but dims as my grandfather appears. The top lights do the opposite, so the light brings the focus to my grandfather's face. I feel the camera animation could be a little more obvious, so I started up another test of this shot that should be posted tomorrow as I left it in uni for rendering.
Tuesday, 27 March 2018
Major Project: Pufferfish (w/ buildup), Skin & Silk Composites
My pufferfish, skin, and silk shots have now been rendered and composited. That means that the only heavy shot left is the soap bubbles and a possible snow re-work, which is a relief. For these shots I played around more with animating different effects to affect the scene. For pufferfish I animated the vignetting and blurring to become heavier as the animation progresses to ensure the focus is on the pufferfish. I included a GIF showing the buildup of this shot including the different render passes that I used.


For skin, I blurred the skin to start with so it was somewhat unrecognisable and mysterious. I want there to be a sense that it is something fleshy - but it is unclear exactly what it is as I discuss how I see my skin when I see chicken skin. As the animation progresses and the camera pulls away, the blurring decreases, revealing that the audience has been looking at an orb of bumpy flesh.

I wanted silk to remain simple and elegant. I haven't added much additional blurring although I have a matte pass if I decide to add this later on. I did add in slightly heavier motion blurring than I do on most shots to soften this animation some more. I also have quite heavy vignetting on this scene to make the whole shot feel softer.


Overall I'm really happy with how these three shots came out, especially silk since it was hard to determine how it would look based on my test renders due to the graininess. All of the blurring and vignette animation can still be changed, I just wanted to see how it could change how the shots felt and where the focus was.
Major Project: Re-filming Live Action Footage
Now that the majority of my shots are rendered, I need to go back into Maya and experiment with re-filming my live action footage. I think I have most of what I need in regards to that, although I need to film my own video of jello since right now I've been using a clip I found online.
First I created a simple polygon plane in Maya, then connected a shader (it varies depending on the test) then plugged in a projection node into the colour so I could project my footage onto the plane. My first test I used a surface shader, so it did not require any lights. I then animated the camera but made sure that the projection always filled the screen. These tests I'm only uploading as YouTube videos since they are quite long and will not upload as GIFS.
I liked how this looked and I then went to see what else I could do to make it feel '3D'. I experimented with different lights so there would be very subtle highlighting on the plane. I tried using just a directional light as well as adding several area lights. Both of these tests I experiment with flickering the light. I found with the directional light, it just looked like the whole shot was flashing since that one light was illuminating the entire scene. With the area lights, only one of three lights would flicker, preventing the entire scene from going dark.


First I created a simple polygon plane in Maya, then connected a shader (it varies depending on the test) then plugged in a projection node into the colour so I could project my footage onto the plane. My first test I used a surface shader, so it did not require any lights. I then animated the camera but made sure that the projection always filled the screen. These tests I'm only uploading as YouTube videos since they are quite long and will not upload as GIFS.

I also experimented in After Effects using lights as well as other effects such as animating vignettes. I experimented with both spot lights and point lights. I found the spot light particularly difficult to control and I preferred the point light out of the two. However, one perk of doing it this way is that render times remain lower...the more lights I add in Maya the slower the renders will be (1 second per frame without lights vs 30 seconds with 3 area lights).

After seeing the previous five results, I think I liked #3 (Maya area lights) the most. I decided to return to this scene and adjust the position and scale of the area lights. I also wanted to try adding a vignette to the footage prior to bringing it into Maya - so the vignette effect is part of the projection. I hope that this will help further separate the projection screen from the viewer. This is currently rendering and the results will be posted tomorrow.
Monday, 26 March 2018

Sunday, 25 March 2018
Major Project: Possible Snow Rework
Out of all of my entities 'snow' has been the one that I felt most unsure about. Initially I had an ice texture, but then this was changed to falling snowflakes. I'm already rendering that out, but for some reason it just don't feel completely 'right' to me. I think it may break the mould of the spheres too soon in the animation. I've also been debating about using live action footage for this part of the poem, but I'm already using quite a bit of live action footage around this portion of the film. Since most of my major shots have been rendered or are rendering, I wanted to return to snow and see what else I could do with it.


I found two tutorials on how to make a snow material. I mostly used this tutorial by Jarrod Hasenjager but I also watched this YouTube tutorial. I struggled a bit because I didn't have the 'type' setting under 'Subsurface' so I wasn't quite sure what to do. I discovered that in December, there was an update for Maya/Arnold that added some extra settings to the AiStandardSurface shader. This was incredibly helpful, as the 'randomwalk' setting really improved the subsurface scattering. I'm happy with how the snow looks, especially after adding the extra sparkle details. I'll probably do a quick animation test to be sure it works the way that I want.

I do worry, however, that the computers at university do not have this update and therefore I'll be unable to use those computers for rendering. I do have my computers to render at home, so I may just have to make that shot relatively short compared to my other shots so I can actually accomplish it in a reasonable amount of time. I am also conscious that this scene may not work in Maya on machines that do not have this update, so I may just use my one computer but I'll have to see. I wonder if this 'type' setting would also help improve my skin, pufferfish, and sponge textures in the future.


Subscribe to:
Posts (Atom)