Tuesday 27 February 2018

Major Project: Scene Cleanup & Lighting / Texturing Tweaks #2

Here are a few more shots I've been working to clean up and tweak. Like I mentioned in my previous clean-up post, I tried to remove as many lights as I could, adjusted the samples (render settings, lights, and aiAtmosphere), limited the rays where possible, clamp samples, and increase the low light threshold.

This is all in preparation for final rendering, and seeing that I have some shots locked down (even if I choose to rework them later on if I have time or need to) puts my mind at ease somewhat. I cleaned up my needle shot as well as my wires shot...although with wires I know I may decide to go back and tweak since I put that one together relatively quickly. I'm also aware that the wires are a little difficult to see, so I plan on rendering out a mask pass so I can blur the background slightly if needed.


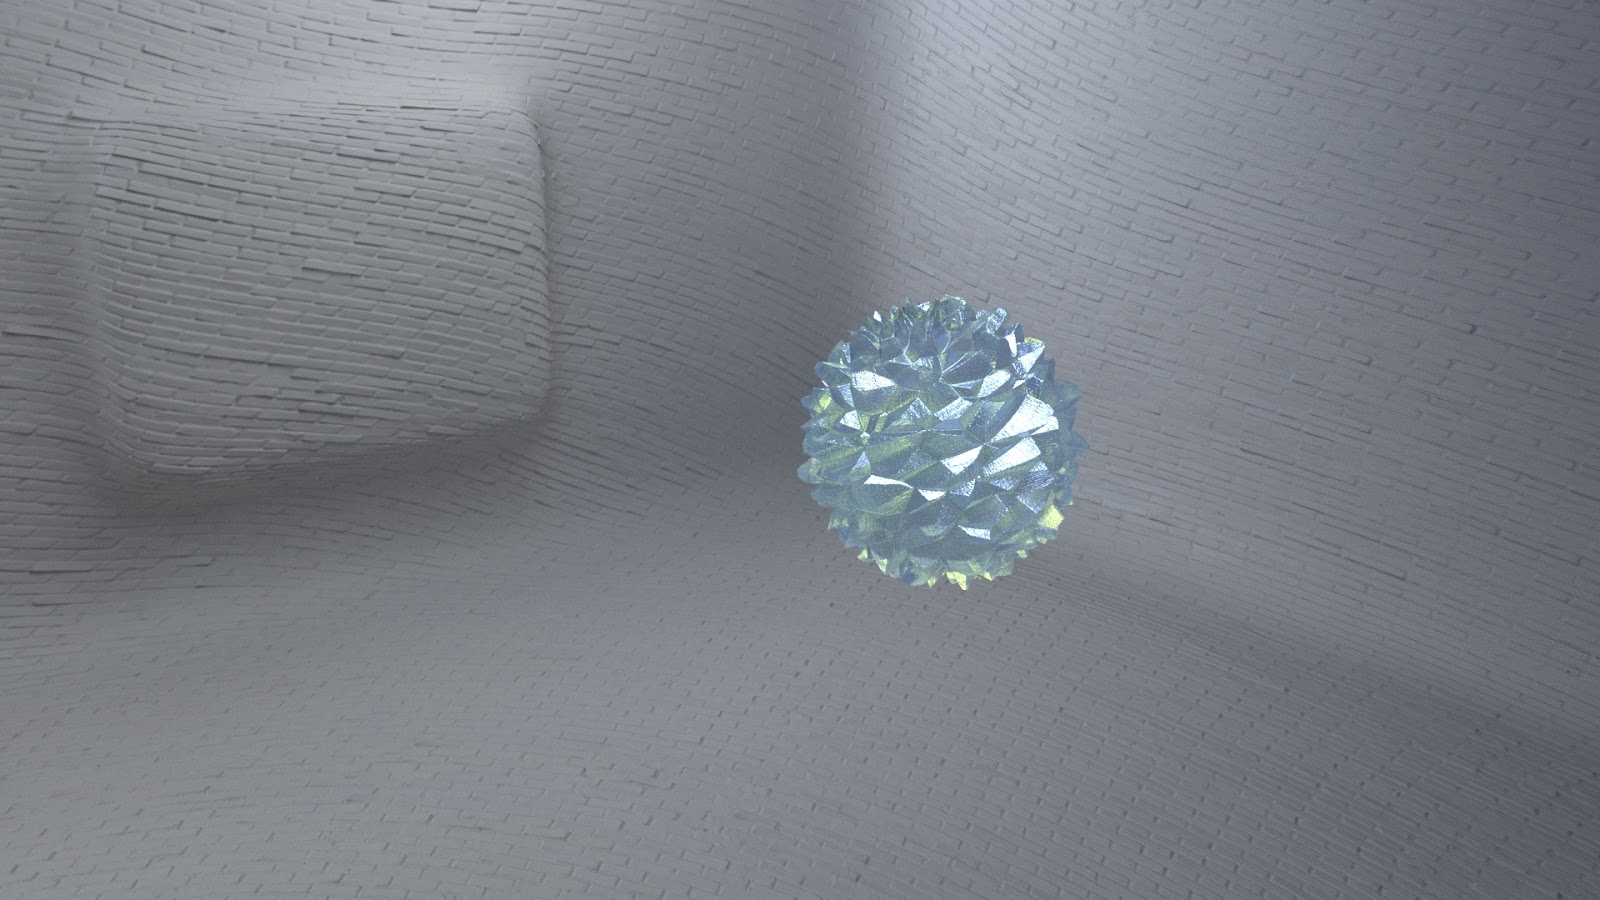
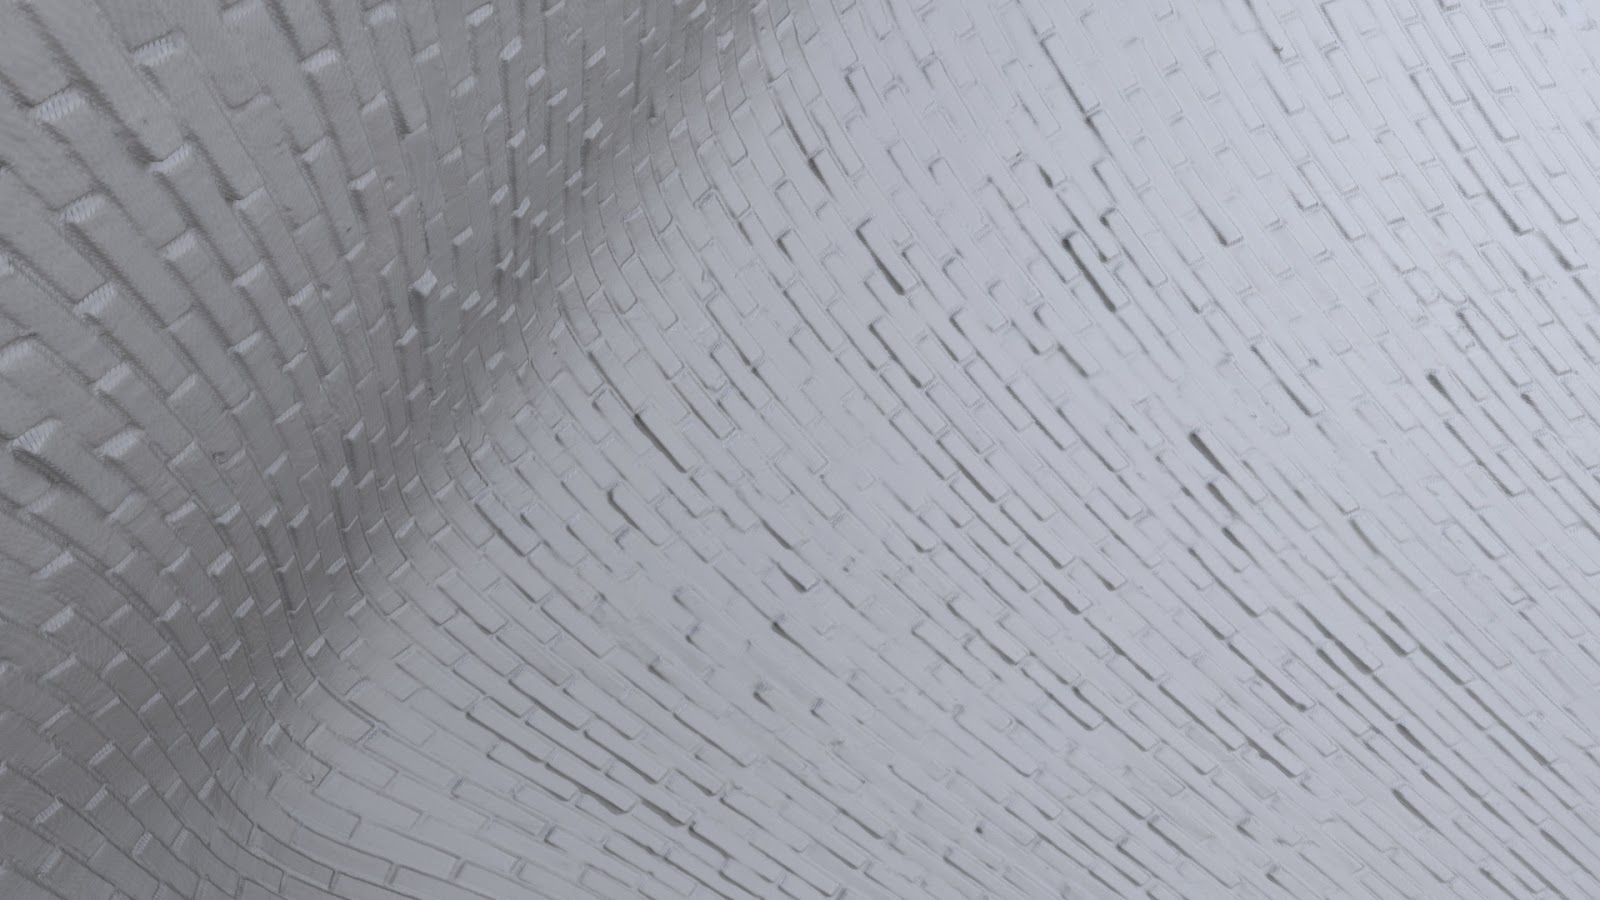
I've also begun working on cleaning up my room/brick shots. These shots take less time to render than some of my other scenes such as needles and gem, but again I'm glad that I'm getting stuff ready to render so I have a selection. During these clean-ups I also noticed that odd stretching in the bricks again. I did some research and tests and discovered that ticking the 'smooth tangents' option and setting Adaptive Error to something around 0.010 decreases this and makes the bricks appear sharper.

Adaptive Error (0.000) - Smooth Tangents Off

Adaptive Error (0.015) - Smooth Tangents On


I wish I knew this previously, since I already have some shots rendering. However, that is why I'm cleaning up these scenes early...so I don't discover things like this last minute. Luckily the scenes I'm rendering will probably be fine anyway since the bricks aren't super up close to the camera or the shot will be focused on a specific object. But, if I need to re-render a few things then I'll have time.


Monday 26 February 2018

Major Project: nParticles 'Bee Swarm' Test #6

Over the weekend I set up a test render for another bee swarm. This time I attached the particles to a sphere, so the mass of small spheres take on the shape of one large sphere. I then used a combination of fields and solvers (turbulence, gravity, newton) to control the swarm so they break away from their original sphere mould and scatter.

Unfortunately, the computers restarted over the weekend so it didn't render the full frame range. In the original scene, the swarm eventually disperse near the end of the animation. Something odd happened in my scene when I tried to reopen it to continue rendering (I had a cache) the orbs wouldn't break away from their original moulding. So, I was unable to re-render the remaining frames unless I began the simulation from scratch, which may not marry up to the frames I already created. So, I thought I'd post this animation rather than spend the time re-rendering the entire thing.


Despite the issue I had with the computers restarting, I quite like the results especially with the camera movement. I wanted to focus on some smaller spheres first, then zoom out to reveal the mass of spheres creating one large sphere. I was able to get a depth pass, but it was limited compared to what I wanted. Even with the file set to a 32 bit image, uncompressed, and set to raw...it still turns pure white really quickly. I'm still struggling to get the hang of the AOV system which is frustrating, but I'm doing what I can at least.

Major Project: Scene Cleanup & Lighting / Texturing Tweaks #1

Over this upcoming week I wanted to begin rendering some final shots so I can start building up an archive of rendered scenes to use in my film. I've come up with a list of shots that I feel are finished, such as the gem scene, that I can render now and tweak later down the line if I need to or have the time. Since the gem takes so long to render, that was top on my priority list for finalising and rendering. I returned to my scene to see if I could further decrease what was in the scene such as unneeded lights. I feel I have flexibility with lighting and appearance of the room since it is an abstract, ever-changing mind-space. I spent some more time changing the amount of rays in the scene and adjusted the samples in the render settings and on the lights to decrease the amount of noise.


I also connected the position of one of the lights to the gem so I have better control over how the gem looks (hopefully this will look alright animated). I also clamped the AA samples and increased the low light threshold settings to try and restrict the render time as much as possible. I also wanted to tweak the colour of the gem slightly, so it was more greenish blue rather than the colour it originally was because it seemed a little dull to me. I wanted it to appear attractive but also unnatural. I'm quite happy with how the tweaked shot looks and I think it's now ready for final rendering later this week (the 'before' render is not what I sent to the test the render farm, I just wanted to do some more tweaking on it).


I also have a few shots of the room that are ready to render. It was suggested to me to just make a bunch of shots of the room and of the bricks, since the room is a very important 'character' in my film. I want to create a second pre-vis of my film as well, increasing the time the viewer spends looking at the room so I think it would be good to have a library of shots to use and re-use if I wish. One specific room shot that I think is ready is the shot I'm specifically using for When I think of perfection I see smoothness, since it mostly focuses on the animation of the bricks.


I noticed some odd lines in my bricks, which I think has to do with the displacement settings. I tried increasing the subdivision iterations but I noticed it did not like to render when I did that and some other errors cropped up that were more noticeable. I'm sure most people wouldn't notice it, I just do since I stare at the renders all the time. I suspect it'd be less noticeable as well once the camera is moving, motion blur is added, and other VFX. Like the gem, I spent time adjusting the samples to remove noise, delete unneeded lights, clamping samples, adjusting the low light threshold, and adjusting the lighting overall.


Saturday 24 February 2018

Major Project: Static Mesh Light Test #1

Now that I know I can successfully create static in my final digital set, I wanted to see if I could integrate it into the scene more. To do this, I decided to convert the orb into a mesh light and plugged the TV static footage into the light so the brightness would change depending on what the static was doing. This means that the light from the static will flash and influence the lighting in the room as well as the atmosphere. For this shot I have the mesh not visible and composited the orb back in as I have done previously so I could have better control over it.

Initially I didn't like how this turned out, but after tweaking the brightness in AE (in the initial render the flashes were far too bright I think) I liked the results much more. I want the light to influence the environment, but not so that it's too distracting. As mentioned in the 'mesh lights' tutorial, there is a lot of noise cleanup needed with a mesh light...right now this test looks very grainy but I didn't want  the render to take too long. There are also some odd shadows on the wall in the beginning of the shot that I have to investigate. I'll continue to experiment with this as I think the flashes could really enhance this shot.

Friday 23 February 2018

Major Project: Wires Animation Update

Today I worked on updating my wires texture/object for the line When I see hospitals I feel wires. I used a similar technique I worked with months ago, where I created CV curves and edited them before extruding long the curve to create a mesh. I created a polygon sphere, similar to many of my other objects, and used it to snap the control points of the curve so the curves eventually took a spherical shape. I rebuilt the curve several times during this process, to ensure everything was spaced out the way that I wanted to ensure the wires animated smoothly later on.


Previously, I used a NURBS primitive to extrude along the curve but this time I chose to create a polygon cylinder using a script which created additional settings that allowed me to animate how far along the curve the polygon mesh was. This allowed me to make the wires look like they are snaking and winding around into their final shape. For the texture I used the Rubber preset on the aiStandardSurface shader but made the wires a bit darker since the grey faded into the background (it is now darker than the renders below, but I still like how it looks in these renders).


Below are three playblasted animation tests (not fully rendered). The first one the wires are already fully extruded and are not animated, the second has animated wires, and the third has completely different camera animation and different timing. Out of my three animation tests I like #3 the most because it feels sinister and lingering. I also feel as though the wires/shape of the wires resembles blood vessels or the human nervous system when other parts of the body are stripped away (medical diagrams or anatomy museum models).

Wires #1

Wires #2

Wires #3

Thursday 22 February 2018

Major Project: Sugar Cube Animation Render Test #1

A few days ago I set up a render with my sugar cube to see how the texture worked in an animation rather than just a still render. I'm glad I've done this because while I am happy with how it looks in a still image from certain angles, I do not like how the animation turned out. To me it doesn't look correct... it doesn't 'sparkle' the way I want it to and the specularity looks odd to me. I also noticed there was an error with some reflections on the surface of the cube in the beginning of the animation. This may be due to the lighting or due to the texture itself (which is what I suspect).


I'll have to return to this and see what I can do to improve it, but I was also considering having this portion of the film be live action for several reasons. I feel that in the film, I use live action several times near the beginning and middle of the animation but nearer the end it's all CGI. I like pulling the audience out of my digital world to show that this is my real life.

'Sugar' is an important part of my 'hope' stanza because I like sweet foods and when I was sick I didn't allow myself anything sweet. I rejected invitations to go out for ice cream, have cake with my family, bake cookies with my grandmother, and I didn't let myself put any sugar in my coffee. I'd hide lunches that my father would make for me even if he put chocolate or cookies in it. As I improved and learned how to cope with my condition, I allowed myself to have foods that I enjoyed and to spend time with my family rather than hiding and avoiding. I think it may be an option to include some footage of some cafes that I visit with family where we tend to get coffee and sweet treats. I'm still going to see what I can do in regards to the sugar cube, but I think live action is at least an option I can consider.